Towers Family Chiropractor

Helping You to Better Health Naturally

  • Home
  • About Us
  • Our Chiropractic Services
    • Chiropractic Care
    • Acupuncture
    • Nutrition Services
  • Helpful Videos
    • Posture Screening for Scoliosis and Posture Imbalances
    • Spinal Exercises
  • Patient Forms
  • FAQ
  • Contact Us
  • Chiropractic Solutions
  • Children’s Adjustments
  • Monica’s Recipes
  • Nutrition News
  • Healthy Habits
  • Patient Testimonials

Nut Or Seed Butter

May 16, 2022 by towers

Nut butters can be hard to digest and for people who have less of an ability to digest fats they may be off limits.  By preparing your nuts and/or seeds this way you may tolerate them better.  But keep in mind that eating nuts seems to cause some people who are eating a low-carb diet to gain weight–particularly belly fat.  This may be related to the high arginine to lysine amino acid content of nuts.  Be aware of this and limit your intake of nuts in general.

Follow the instructions  given in a previous post for preparing your nuts/seeds.

What about peanut butter?  Well, lots of folks don’t digest it well.  Afterall, peanuts are a legume (as in dried beans) and not a true nut.    Also, there is the possible contamination of aflatoxins–liver-harming toxins from mold that grows on peanuts even if they are organically grown because they are an underground crop.

If you are allergic to tree nuts, you can use 2 cups of pumpkin or sunflower seeds instead of using walnuts.


You will need a blender or food processor.


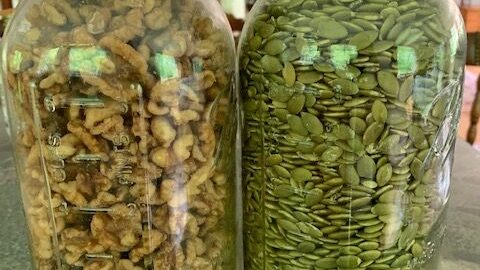
1 cup “prepared” walnuts

1 cup “prepared” pumpkin seeds

2 Tbsp. ghee, melted (you may substitute coconut oil)

2 tsp. honey, optional

salt to taste if your nuts were nut prepared with salt


Melt the ghee in a metal bowl on low heat.  Remove from heat and set aside.  Blend the pumpkin seeds first–blend until finely ground.  Add to the bowl of melted ghee and stir well.  Add the honey if you desire it and stir well again.  Blend the walnuts in the blender until finely ground and add to the mixture.  Stir well.  Taste and add salt if desired.  Keep in the refrigerator.  It will harden so that it is hard to spread but you can remove the amount you need and allow it to warm to room temperature for easier spreading.  Great on apple slices or celery sticks.
 

Filed Under: Monica's Recipes Tagged With: pumpkin seed butter recipe, walnut butter recipe

Go Nuts

May 16, 2022 by towers

Get the best taste out of your raw nuts while making them easier to digest by following these simple steps.  It’s worth the time to make a big batch and store them long-term in the refrigerator.  I try to always have one or more varieties available for snacking or baking or making nut butter–my favorites are walnuts but pecans come in second.  Pumpkin and sunflower seeds are good too.  I have made a nut butter with a walnut and pumpkin seed mix which is yummy–look for the recipe here.  I avoid cashews–they are never truly raw because they have to be heated to remove a poisonous compound.  They may still contain some of this poison ivy-like compound and I wonder if that is why I don’t feel good when I eat them.

So this is what you need to do:

Purchase raw (be sure they are not roasted or pasteurized) nuts.  If you can get organically grown that is best–I order nuts from here. They are expensive but I wait until they have a sale and get enough for free shipping–sign up for their emails for the sale notification.  Then store them in the freezer until you are ready to process them.  For pumpkin and sunflower seeds, I purchase from here.

Measure about 2 quarts of nuts/seeds and place into a large bowl.  Add enough water to totally cover the nuts. Allow to soak overnight or about 12 hours.  Drain and rinse very well until the rinse water is clear–the soak water will be very brown with walnuts and pecans.  The soaking rids the nuts of some harsh-tasting stuff so be sure to rinse very well.  I use a large colander for draining–allow to drain until no water is dripping from the bottom.

Pre-heat an oven to 140 degrees F.  or the lowest setting on your oven.  Spread the soaked nuts/seeds in large shallow baking pans–a thin layer will cut on the drying time needed to thoroughly dry.  Salt the nuts if desired–about a teaspoon of nuts per quart of nuts.  Stir well to distribute the salt–some of it remains on the pan so don’t think this is too much salt–and spread again in an even layer in the pan.  Place the pans in the oven until the nuts/seeds are thoroughly dry.  This may take 4-12 hours depending on your oven temperature and the thickness of the layer in the pan.  The first time you make them check them every 2 hours (stir them while you are at it for quicker drying) by biting into one to see if there is still moisture in the center.  If your oven has a drying option at 140 or lower, they will nut burn if left longer.  In fact, they can may taste better.  Once I left walnuts for 16 hours at 140 and they were very buttery and now I leave them past the point of drying.

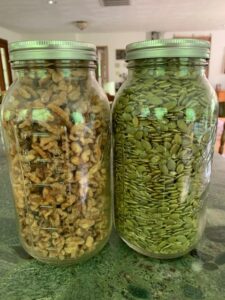
Remove from the oven once thoroughly dry.  Allow to cool and then place in glass jars.  I use 1/2 gallon, wide-mouthed mason jars as pictured above.  Store in the refrigerator.  They will keep for weeks.


Filed Under: Monica's Recipes Tagged With: processing nuts, sprouted nuts

Going Going Gone

May 12, 2022 by towers

Please explain why you came to our office.

“I came because my shoulder was hurting.”

Please describe your response to treatment.

“After the first adjustment my pain decreased immediately.  And after a month the pain is almost completely gone.”

33 year-old male

Filed Under: Patient Testimonials Tagged With: shoulder pain and chiropractic

From Very Tight to Very Pleased

May 4, 2022 by towers

Please explain why you came to our office.

“I felt very tight in my mid-back, low back, and shoulders.  There was also numbness and sharp pain.”

Please describe your response to treatment.

“Very pleased, pain free after some exercise at home but mostly from Dr. Burgoon’s adjustments over just a couple of months!”

70 year-old female

Filed Under: Patient Testimonials Tagged With: chiropractic for numbness and sharp pain, chiropractic for tight back and shoulders

Daikon Saute

April 22, 2022 by towers

Daikon radish, though often overlooked, is a nice mild-tasting  root vegetable addition to vegetable sautees.  It belongs to the cruciferous family of vegetables which is known for many health benefits when included as part of a diet.
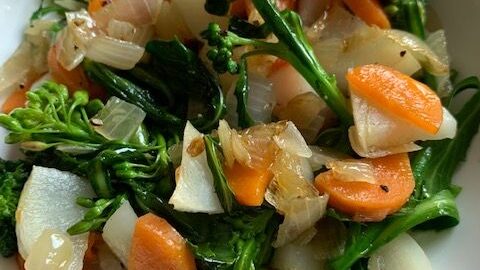
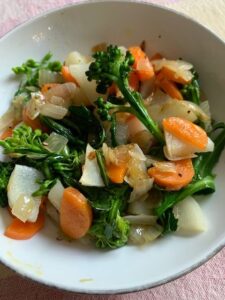
Here I have made use of winter-grown vegetables from my greenhouse and cold frame, but these vegetables are all available in the produce section of most grocery stores and natural food co-ops.  If you have a cold frame, give daikon radish a try–they grow fast, are very cold hardy, and store well once harvested in the refrigerator.  Also, if your collards or kale goes to flower, pick the flower heads before they open–they are similar to broccolini.

This vegetable mix can be served over rice, millet, quinoa, or can be served as a side.


Serves 2

4 Tbsp. ghee

1 cup chopped yellow onion

1 cup chopped daikon radish (quarter lengthwise and then slice in 1/4 inch pieces)

1 cup chopped carrot

1 cup broccoli or broccolini florets (or your kale or collard  that are starting to flower–see the picture above.  Really look like broccoli!)

salt, black pepper to taste


Melt ghee over medium heat in a large skillet.  Add onions and saute with an occasional stir for a few minutes.  Add the carrots and daikon and stir well.  Cover with a lid and continue to cook over medium heat stirring occasionally until carrots are tender.  Add florets and stir.  Crack the lid and cook until the florets are just tender and bright green–do not overcook!   Remove from heat and add salt and black pepper (if desired) to taste.  Serve as a side or over rice, millet or quinoa that was previously prepared (see recipe link above).

Filed Under: Monica's Recipes Tagged With: daikon radish recipe

Support Your Immunity

February 28, 2022 by towers

Recommendations for supporting the immune system:

  1. Most important recommendation–eat an anti-inflammatory diet. Basically this means no sugar, white flour products/gluten grains, vegetable oils (canola, soy, corn, sunflower, safflower, peanut). For more details on the specifics. schedule an appointment with Monica or ask for our handout in the office.
  2. Vitamin D3. Maintenance dose for adults is 5000 IUs a day (children ¼ to ½ of that depending on weight). If infection is beginning or has occurred, take 10,000 IUs a day of vitamin D3 for 2 or 3 days and then drop down to the maintenance dose.  We recommend the powdered form (not the kind in vegetable oil in gel caps).  We carry a brand that provides 5000 IUs per capsule, plus the option of a D3/K2 combo which is also powder.  We also have drops of Vitamin D3/K2 emulsified in MCT oil —this works for babies and children who can’t swallow pills.  Getting out in the sun has many benefits as long as you don’t overdo and burn but most of us live in areas where sun exposure year-round is not a reliable way to get vitamin D.
  3. Vitamin C. The VitaminCfoundation.org has many research articles linked on their site regarding the efficacy of vitamin C for viral infections.  Apparently it is being used intravenously in hospitals in China for patients with corona virus infection.  Read the articles on the site for more information.  There are recommendations for oral vitamin C intake there also.  VitaminCfoundation.com has good quality vitamin C in various forms available to order.
  4. Andrographis Complex. This is a MediHerb product that we have been using for cold and flu prevention for years.  It is a combination of andrographis, holy basil and echinacea root extracts.  It is available at our office.  If you can tolerate it, place one of the tablets in your mouth and allow it to dissolve; this can instantly improve a sore throat.  Another antimicrobial herb is oregano oil.  We suggest NeuroHemp which besides the cannabinoids provides oregano oil.  Swish a dropperful in the mouth before swallowing.
  5. Chaga Tea. Chaga is a mushroom that grows on birch trees in northern latitudes (Canada).  It has many properties that support the immune system.  Here is a recipe and a source for chaga tea.
  6. Zinc and Quercetin.  Zinc as losengers or as liquid ionic zinc.  , Some extra zinc (about 15 mgs a day)  is a good measure to take as many people are low in zinc. Quercetin helps zinc to be taken up by the cells to fight infection.   Don’t take extra zinc long-term unless you take extra copper also as it may create copper deficiency.  Long-term it is best to rely on a multiple that has all the essential trace minerals in it to maintain adequate zinc levels.  Plus a good multi will provide Vitamin A (as retinyl palmitate , not just beta-carotene) and vitamin K2 both of which help fight infections.
  7. Elderberry extract. Purchase online or at local healthfood stores and take the dose recommended on the bottle.
  8. Use the neti pot to rinse the nasal passages daily with salt water, plus brush your teeth with a drop of tea tree oil and 1/4 tsp. baking soda on your toothbrush along with your toothpaste for the anti-microbial effect of the tea tree oil. You can also gargle with a drop of tea tree oil in some hot, salt water–do this hourly to reduce microbes hanging out in the back of the throat that may or may not be causing symptoms.
  9. Take a good spore-based probiotic such as Just Thrive or MegaSporebiotic, which we have available in our office.
  10. NAC or N-acetyl cysteine is an amino acid that helps boost glutathione production in the body.  NAC has benefits itself but glutathione is a major detoxifier and that alone is a good reason to take–500 mgs a day.
  11. Stay warm and hydrated with a variety of herbal teas, such as tulsi, licorice root, chamomile, mint.  Raise the body temperature to the point of sweating to help kill viruses by sauna or hot baths.
  12. Breathe and get enough sleep! Diaphragmatic breathing to keep calm is a no brainer!  Ask for our instruction handout. Doing this before sleep is helpful for insomnia. And if you are exposed to wifi or cell phone radiation especially at night it is having an impact on your cellular health and suppressing your immune system.  Ask us for more information.

Filed Under: Healthy Habits, Nutrition News Tagged With: immune system support, nutritional support for immune system

April’s GF Cookies

February 23, 2022 by towers

Here’s a gluten-free recipe from April for some very yummy cookies packed with superfood ingredients.
2.5 c raw walnuts,  ground (or finely shredded dry coconut if you have a nut allergy)
2/3 c oat flour or arrowroot (or all arrowroot if you don’t have GF oats)
1/2 c pure, organic maple syrup
1/2 c flaxseed meal (buy whole flax seed and grind in a blender as flax meal is perishable)
1 tsp sea salt or mineral salt (can leave out until the end and sprinkle tiny bit on each cookie before baking if preferred)
2 tsp pure vanilla extract
2 T chia seeds (optional)
2 T hemp Seeds (optional)
Optional topping:   either 1/2 c of chopped-up dark chocolate or raisins or craisins or dried cherries or a combo.
Mix all ingredients–easiest in a food processor.   Form into balls on pan (stoneware or baking sheet lightly coated with ghee)
Flatten with fork in crisscross pattern.  Top with toppings of your choice–press them in half-way.  Bake at 350° F for 12 to 15 min…the first time begin watching them 10 min in. Do not overcook unless you like crunchy cookies.
Let them cool.

Filed Under: Monica's Recipes Tagged With: GF cookies, gluten-free cookie recipe, Superfood cookies

Sunchokes

January 28, 2022 by towers

If you are a  gardener, you are likely planning what to plant for the 2022 growing season right about now.  I wanted to put in a plug for sunchoke tubers for lots of reasons:

  1. the tubers are versatile and make delicious soups, roasted or stir-fried vegetables, “pickles”, and raw salad garnish.
  2. they are low-glycemic or low starch even  though they resemble potatoes–the carbohydrate in them is called inulin and is a good gut microbe prebiotic.  See this recipe for how to roast them–I recently mixed 2 small potatoes, 4 large sunchokes and 1/2 sweet red pepper with the seasonings in the recipe.
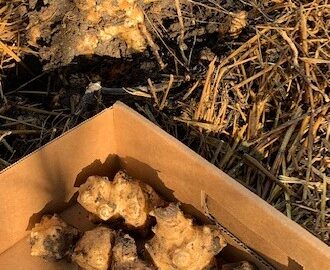
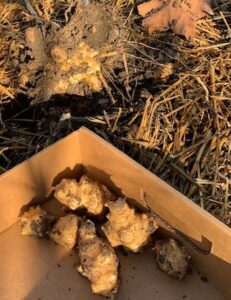
  3. they are easy to grow and prolific–meaning 1 plant makes A LOT of tubers (see the picture which shows 1 plant being dug up).
  4. the tubers remaining in the ground will make a new crop the following year.
  5. they store very well in the ground over winter (as long as you mulch them heavily with straw or leaves) so you can dig them up as you need them.
  6. the beautiful sunflower-like yellow flower is enjoyed by pollinators and makes a nice cut flower (the painter Monet thought so)  if you can reach it! (plants can reach 8 ft. tall).
  7. they spread which is good as long as they are harvested so keep them in a restricted area of the garden.  Give them a try!

Filed Under: Monica's Recipes Tagged With: growing sunchokes

Meyer Lemon Tree–The Best House Plant!

January 27, 2022 by towers

Meyer lemons are prized as gourmet lemons.  Amazingly enough, they are easy to grow as  house plants.  I have had the same one for over 15 years now and it has consistently produced lemons except for a few years when I wasn’t paying enough attention to it–this year it made 40 lemons despite a trunk diameter of no more than 1.5  inches!  This picture has a tangerine tree in front of the lemon but you can see the lemons.  The pots are on plastic trays with wheels that make it easy to move around.

From November to March  it’s inside in front of a sunny window and we enjoy its fragrant blossoms in late winter.  On warm early Spring days we move it outside for the day so the honeybees can pollinate the flowers.  Tiny green lemons form and grow all summer long and can be harvested in late Fall once fully yellow.   During the warm months  of the year we have it outside in full sun on the deck.    From a permaculture point of view this is an ideal house plant–it serves many desirable functions.  We are so enamored with this tree that we eat the lemon rinds too by drying and grinding for seasoning/tea or candying them in just maple or coconut syrup (1 Tbsp. with chopped rind of 1 lemon simmered with an occasional stir in a shallow pain until rind is soft and has absorbed all the liquid-keep in refigerator).   If you decide to try your green thumb with a Meyer lemon, in can help maintain it to foliar feed it once a week with an organic liquid fertilizer (such asSpray’n grow) or to use Espoma organic citrus fertilizer 4 times a year.  Give it a try!

Filed Under: Monica's Recipes Tagged With: candied lemon rind, growing meyer lemon, honeybee pollination, lemon flower pollination, meyer lemon, permaculture

Chick Peas and Delicata Squash with Rice

January 18, 2022 by towers

Good winter meal–warming and filling.  This type of squash compliments the chick peas very nicely so do your best to find a delicata.  Our local Earthfare store carries them.

Just serve with a salad for an easy meal.


Serves 2-4

Rice:

1 cup brown basmati rice, rinsed well and drained

1 and 1/2 cups water,

1/2 tsp. sea salt


Vegetables:

4 Tbsp. ghee

1 cup chopped yellow onion2 tsp. ground cumin

1 and 1/2 cups finely chopped delicata squash (do not peel the squash–just wash well, cut in half and remove the seeds and then cut each half lengthwise again and cut crosswise in 1/4 inch pieces)

2 cups COOKED chick peas

2 Tbsp. organic tamari

2 Tbsp. nutritional yeast flakes

1 cup water

sea salt and pepper to taste

cayenne to taste, optional


Start the rice first.  Place rinsed and drained rice in a sauce pan and add water and salt.  Bring to a boil and immediately reduce heat so the mixture just simmers.  Cover with a lid.  Do not remove the lid until 30 minutes of simmering and if all the water is absorbed, remove from heat. If some water remains, cover again and simmer another 5-10 minutes until all the water is absorbed. Keep covered but set aside until vegetables are ready.

Melt the ghee in a large skillet.  Add the onions and stir over medium heat for a few minutes.  Add the cumin and stir again.  Add the squash and stir well and cook for a few minutes more before adding water and tamari.  Once the mixture starts to simmer reduce to low heat and cover with a lid for 10 minutes.  Once squash is cooked through add chick peas and nutritional yeast and stir well.  Bring to a simmer again and remove from heat.  Season with salt and pepper to taste.  Serve in bowls over rice immediately.


Filed Under: Monica's Recipes Tagged With: chick pea recipe, delicata squash recipe

« Previous Page
Next Page »

Subscribe to get our Blog posts in your email.

* indicates required
/* real people should not fill this in and expect good things - do not remove this or risk form bot signups */

Intuit Mailchimp

(We don't spam or sell your email.)

Recent Posts

  • Safer, Healthier Breast Screening in Roanoke
  • OFFICE CLOSED FOR MEMORIAL DAY
  • EXERCISE FOR OPTIMAL LYMPH FLOW!
  • Listen to Your Wife
  • First Time In My Life

Categories

Tags

arm and hand numbness avocado recipe avocado smoothie back pain breastfeeding latching problems butternut squash recipe chick pea recipe coconut oil collard greens recipe cultured vegetables daikon radish recipe difficult neck movement dill sauerkraut eggplant recipe foot pain GAPS friendly GAPS friendly recipe gentle chiropractic adjustments gluten-free gluten-free recipe headaches headaches and chiropractic herb tea high fructose corn syrup hip pain immune system support jaw pain knee pain knee pain and chiropractic low back pain low back pain and chiropractic mid-back pain migraines neck pain neck pain and chiropractic treatment pesto recipe raw fudge scoliosis separated shoulder and chiropractic shoulder injury shoulder pain shoulder pain and chiropractic sweet potato soup vegetable juice weight loss

Good Nutrition

Warming Broth for a Cold

When you're feeling down with a cold, the last thing you may want to do is cook!  Well, if you keep a few ingredients on hand you can make this nourishing, soothing broth in a few minutes.  If you … [Read More...]

  • Oatmeal is Back
  • Ginger Punch with a Kick
  • Polenta

Children’s Adjustments

Children's chiropractic adjustment at Towers Chiropractic

Children with back pain

Children suffer injuries that lead to misalignments just as adults do. Children generally respond very well and quickly to gentle chiropractic adjustments. A case in point is that of a 5 year-old … [Read More...]

  • Adjusting Children

Towers Family Chiropractic

2302 Colonial Ave, SW, Ste A
Roanoke, VA 24015
(540) 343-6636

Our hours are:
Monday, Wednesday, Friday:
10:00am – 1:00pm and 2:00pm – 6:00pm
Tuesday, Thursday:
7:30am – 11:30am and 12:30pm – 4:00pm
Saturday:
9:00am – 12:00pm

These statements have not been evaluated by the Food and Drug Administration. The information on this website is not intended to treat, diagnose, prevent, or cure any disease.

Copyright © 2025 · Towers Family Chiropractic by Soupbone Creative