Towers Family Chiropractor

Helping You to Better Health Naturally

  • Home
  • About Us
  • Our Chiropractic Services
    • Chiropractic Care
    • Acupuncture
    • Nutrition Services
  • Helpful Videos
    • Posture Screening for Scoliosis and Posture Imbalances
    • Spinal Exercises
  • Patient Forms
  • FAQ
  • Contact Us
  • Chiropractic Solutions
  • Children’s Adjustments
  • Monica’s Recipes
  • Nutrition News
  • Healthy Habits
  • Patient Testimonials

Search Results for: gluten-free bread

GF Bread Updated– Nut-free Version

September 28, 2020 by towers

Here is an update on the gluten-free bread described below:  I have had people with nut allergies wanting to make this bread which has almond flour originally.  It works very well to substitute tigernut flour for the almond flour.  Tigernut is a tuber, not a nut and it can be found online when looking for gluten-free flours–a good brand is Organic Gemini.  Also, if you have egg whites you want to use, blend some with the water used in this recipe and reduce the volume of water accordingly.  It will increase the protein content of the bread (tigernuts are lower in protein than almonds) and allows it to brown nicely.

One other note to keep in mind:  you may have to add more water than is listed in the ingredients.  I add enough water to get a soft dough–it is not sticky as I knead it either as the flours used are highly absorbent–especially the added ground flax.  I probably use about 1/4 to 1/2 cup additional water.  This soft dough is easier to work with and makes a nicer bread.

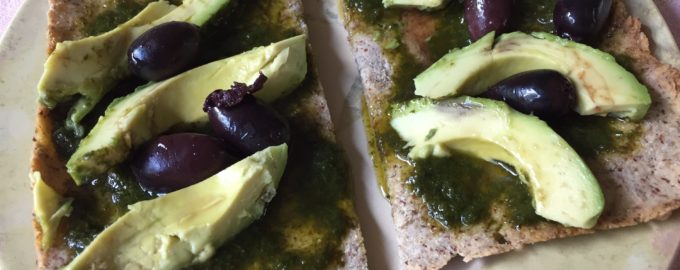
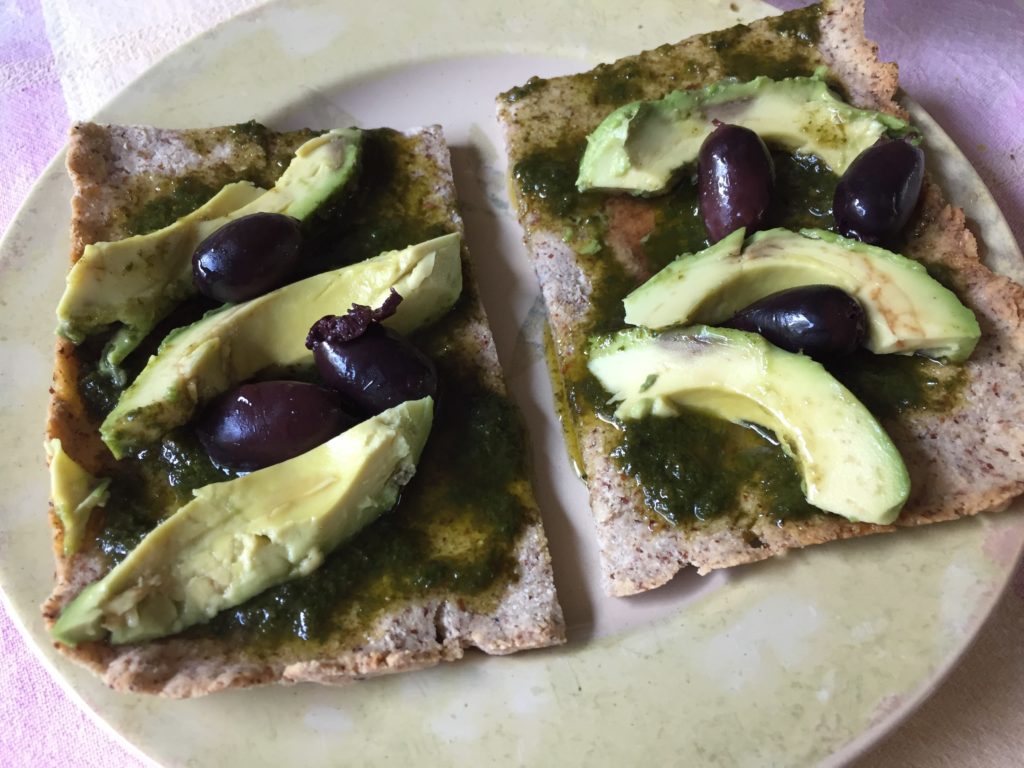
Watch Dr. Eric Berg’s video below for a great recipe for gluten-free bread.  I like it because of the taste/texture but also because it is a lot lower in carbs and higher in fiber than most GF breads–plus it doesn’t have any objectionable starches in it like potato starch.  I have used it for rolls or as pizza dough. My latest version of pizza had a crust made with this dough which I pressed out into an oiled pizza pan (you can sprinkle sesame seeds in the bottom of the pan first–I usually do) and baked at 350 degrees F until crusty–with no toppings.  After it cooled but was still warm, I spread a couple tablespoons of the basil oil on it, followed by avocado slices and olives.  Ready to serve and super easy.   You could add some tomato slices too for a more traditional pizza.  What a treat!

Also, I have at times altered the recipe by adding 2 Tbsp. ground flax seed.  You may need to add a little more water (1-4 Tbsp.) to the dough if you add ground flax seed in order to achieve the soft but not-sticky texture shown in the video.  

It’s best to use the light-colored almond flour which is made from blanched almonds. 

Also, you can refrigerate the dough for a few days; I do this so I can make a fresh pizza or flat bread very quickly during the week.  Great with olive oil which has been flavored with a clove of fresh garlic and some salt.

Here is the list of ingredients: 

1 cup each of coconut flour, blanched almond flour (or tigernut flour), and arrowroot flour

2 Tbsp. psyllium

2 Tbsp. ground chia seeds (I use the blender to grind them and I also add 2 Tbsp. flax seed ground in blender)

1 tsp. sea salt

2 tsp. dry baking yeast granules

1 and 1/4 cup water (egg whites can substitute for some of this liquid if you have fresh egg whites to use)

2 tsp. honey or maple syrup

Follow the directions given in the video for how to mix the ingredients.
https://www.youtube.com/watch?v=zsl5ENgZnr0

Filed Under: Monica's Recipes Tagged With: gluten-free bread, gluten-free pizza

Onion Flatbread with Caraway Seed

May 7, 2018 by towers

Grain and gluten-free, these squares made with mainly onion and dry shredded coconut are best served warm right out of the oven. The caraway seed is optional. I have served them with salad or soup instead of crackers. They are also delicious with a cheese spread made by blending together 1/4 cup feta cheese (I use sheep’s milk) and 2 Tbsp. mayonnaise and some fresh, minced chives if you have them.

Makes about 20 2-inch squares

1 large yellow onion, chopped
2 Tbsp. ghee
2 cups dry finely shredded coconut
1/2 cup sesame seeds
1 egg yolk
3 Tbsp. arrowroot flour
1 tsp. sea salt
1 Tbsp. ground caraway seed (grind whole seeds in blender)

Melt ghee in skillet. Saute chopped onion for about 5 minutes over medium heat stirring a few times. Remove from heat. Place all other ingredients into a food processor. Add the sauteed onions. Process until thoroughly mixed. Place the mixture into an oiled medium-sized baking pan. Rub 1 tsp. olive oil into the palms of your hands and press the “dough” evenly so that it is about 1/4-inch thick. Bake at 300 degrees F until lightly browned and dry to the touch. Baking time will depend on the size of your pan and how thick you spread the mixture–expect about 30 minutes. Remove from oven and cut into 2-inch squares. If you want more of a cracker rather than a moist flatbread, return the pan to the oven and let them bake longer at about 250 degrees F. Monitor closely so that they don’t over-bake. Serve warm, or refrigerate for later and warm again before serving.

Filed Under: Monica's Recipes Tagged With: gluten-free flatbread recipe, low-glycemic flatbread

Grain-free Banana Bread

April 26, 2016 by towers

Looking for gluten-free or low glycemic “bread” recipes?  Here’s one that’s grain-free and very easy.  It is sweet enough to substitute as a cake–just put some chocolate icing on it (mix equal parts melted ghee or coconut oil, honey, and cocoa powder and add some vanilla).  The “flour” I use is shredded dried coconut that is blended until finely ground in a blender.  Arrowroot is available at the Co-op and at most health food stores.

2 cups dried, shredded coconut, blended into a powder in a blender

4 Tbsp. arrowroot flour or powder

1 rounded tsp. baking powder

1/2 tsp. sea salt

1 ripe banana–it needs to have brown spots so it is sweet!

2 tsp. vanilla extract

1 Tbsp. ghee or coconut oil

2 eggs

1 to 2  Tbsp. honey

In a food processor, mix the dry ingredients.  Add the rest of the ingredients and process until thoroughly mixed.  It should be the consistency of cake batter–thick but still drops off of a spoon.  You may need to add more arrowroot but do it by 1 tsp. increments–if you add too much arrowroot the bread will be rubbery so be careful!

Bake in a cake pan at 350 degrees F until a knife comes out clean and the bread is slightly golden on top–about 15 minutes.


Filed Under: Monica's Recipes Tagged With: gluten-free banana bread, grain-free banana bread

GF Corn Bread

October 23, 2015 by towers

Masa harina is an practical substitute for corn meal in this gluten-free recipe. My perception is that when you omit wheat flour  the fine texture of the masa harina makes for a decent corn bread.  The flax and seeds give the bread a corn bread-like texture–if you want it sweeter substitute 1/2 cup of ground dry shredded coconut (use a blender  to grind it) for the sunflower and pumpkin seeds.  Just remember that if you do not buy organic masa harina it will very likely be made from GMO corn.  Also, if you replace the ghee with coconut oil, the recipe will be dairy-free as well as gluten-free.

1 cup organic masa harina or corn meal

1/8 cup each of ground flax and chia seed (whole flax seed and chia seed can be ground in a blender)

1/4 cup ground sunflower seeds

1/4 cup ground pumpkin seeds

1 tsp. baking powder

1/2 tsp. sea salt

1 apple, skinned and cored

2 eggs

1 Tbsp. honey

1/3 cup coconut milk

1 Tbsp. ghee or butter or coconut oil, melted

1 tsp. vanilla extract

Place dry ingredients in food processor and mix well.  Add ghee or butter or coconut oil and pulse until well mixed.  Add all other ingredients and process until well blended into a batter the consistency of cake batter (thick enough that it doesn’t pour off a spoon–it drops).  If it is too thick add 1 Tbsp. more of coconut milk at a time until the batter drops off the spoon readily.  Spoon into a small square baking dish–about 8 inches.  Bake at 350 degrees F until lightly browned and a knife placed in the center comes out clean–about 15-20 minutes.  Do not overbake or the bread will be dry.  Serve warm right away.  It’s good toasted the next day also.


Filed Under: Monica's Recipes Tagged With: gluten-free cornbread

Sesame Greens Sandwich

January 8, 2021 by towers

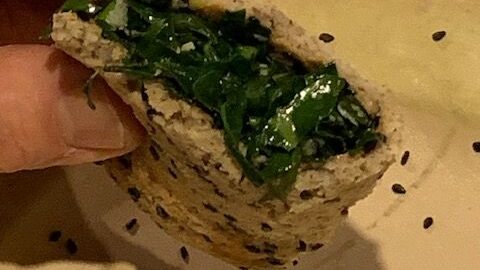
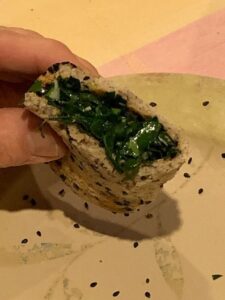
Two recipes that I have posted in the past make for a delicious warm sandwich.  I keep a batch of  gluten-free bread dough in the fridge so that I can easily make a flatbread for this sandwich.  Choose your favorite filling—if you are working to increase your intake of green vegetables, try the sesame greens recipe.  We have kale from our greenhouse which is young and tender.  When using larger leaves of kale or collard greens, cut the thick stems out and discard or use for vegetable broth.  Be sure to cook the finely chopped greens until just tender as described in the recipe.  I like this sandwich served hot–bread fresh out of the oven and greens right off the burner.

Directions:

Wash and chop the greens as described in the sesame greens recipe.  Peel the garlic cloves so they are ready to crush.  Set aside.

Use some olive oil on a baking tray and sprinkle sesame seeds over the bottom of the pan (regular or black sesame seeds).  Press enough dough into the pan so that it is about 3/16 of an inch thick–just like you would to make a pizza. Bake for about 15 minutes (prepare the greens while the bread is baking) until bread is golden brown.  Remove from oven and cut into 6″ x 4″ pieces. Keep warm until ready to assemble sandwiches.

While the bread is baking, prepare the greens by following the recipe.  As soon as greens are tender and still bright green, remove from hear and assemble the sandwiches by spooning 3-4 Tbsp. of the greens over each rectangle of bread and folding in half.  Serve immediately.

Filed Under: Monica's Recipes Tagged With: collard greens recipe, gluten-free sandwich recipe

Fresh Basil Oil

May 29, 2019 by towers

Now that fresh basil is more plentiful–I’ve got a lot already in the garden–let’s make good use of it by preparing this quick, flavorful oil. Remember that preparing ahead when you have time (the weekend?) makes eating well  EASIER when you are busy.  This delicious oil keeps in the fridge a week or so and is very convenient for dressing boiled eggs, salads, pasta, steamed vegetables, grains, and breads–make a pizza with the gluten-free bread I linked and use the basil oil instead of tomato sauce.  It is reminiscent of pesto (see recipe here) but a lot easier!  All you need is a blender.

Also, if you are using it for salad dressing, just add 1 Tbsp. of this oil per 1 cup of salad vegetables and toss.  Then drizzle 1 Tbsp. lemon juice for each Tbsp. of oil and toss again. 

1 cup fresh basil leaves (packed)
Extra virgin olive oil
1 clove garlic
1/4 to 1/2 tsp. salt to taste

Place basil leaves, salt, and garlic in the blender container.  Pour enough olive oil over them to just cover  (about 1/2 cup).  Blend until really smooth.  Place in glass jar and cap.  Ready for use immediately.  Keep refrigerated.

Filed Under: Monica's Recipes

Cauliflower with Pesto

July 5, 2018 by towers

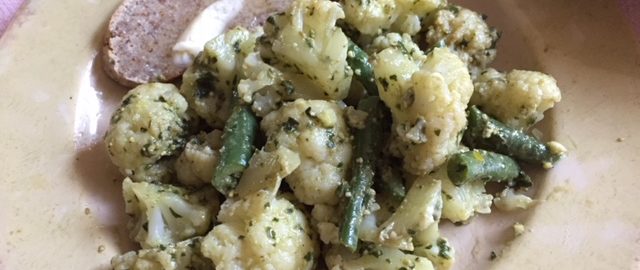
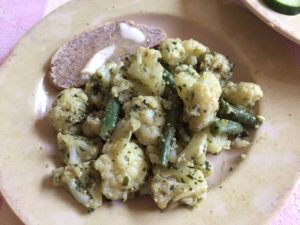
This recipe is a version of a previously posted recipe for green beans with pesto  This one uses primarily cauliflower.  One other difference is that I used pine nuts which does make pesto extra special.  The gluten-free bread shown here was delicious freshly baked and served hot with these veggies.  It is easy to make–stay tuned as I will post that recipe next time.

1 head of cauliflower, cored and cut into bite-sized florets

2 cups green beans, cut into 1-2 inch lengths

pesto, follow the link above for that recipe but double it

4 Tbsp. extra-virgin olive oil


Prepare the  pesto but double the recipe, and set aside.

Steam the cauliflower in a vegetable steamer until just tender–this means you can pierce the florets with a fork with just a little resistance.  Remove from heat and rinse with cool water to stop the cooking, drain, and place in a bowl.  Now steam the green beans to the same tenderness following the same procedure and then adding to the cauliflower in the bowl.  Now use a spoon and mix the vegetables together well.  Add the pesto mix and stir well again.  Add the olive oil and mix well again.  Taste and add more salt if desired.  Serve room temperature or keep in refrigerator to serve cold as it will keep for a few days.

Filed Under: Monica's Recipes Tagged With: cauliflower recipe, green bean recipe, pesto recipe

Polenta

November 4, 2024 by towers

You have likely heard of polenta but maybe never tried it.  If you like corn, give it a try!

Polenta is a gluten-free starch that is quite satiating and best served during the cooler seasons when you are wanting a warming food.  Plain polenta can be served alone or with a full meal as the starch.  It is quick to cook AND there are lots of variations that are fun so be sure to experiment using some of the suggestions listed below.

  • Add 1/3 cup of grated pecorino or parmesan cheese to the polenta right after it is cooked.  Serve hot.
  • Add 1 cup chopped mushrooms (shitake is good) and/or frozen corn to cooked polenta.  Cook on a simmer for 10 minutes more.  Add cayenne ot hot sauce to taste for a spicier version.  Serve hot.
  • Make your favorite tomato sauce (optional to add ground beef, venison, or turkey meat) and spoon over each bowl of hot polenta.
  • Make polenta “bread sticks”.  Cook the basic polenta and immediately pour (should be the consistency of thick batter) into a baking pan lined with parchment paper to about 1/2 to 3/4 ” thickness.  Cover and refrigerate for at least 3 hours or overnight.  Once it hardens it will be easy to cut into strips (about 1″ by 4″).  These strips can be “breaded”–melt a Tbsp. of ghee in a baking tray and spread to coat the bottom of the pan.  Place the polenta sticks in the pan and then flip them so that they get coated on both sides.   Optional: sprinkle with grated pecorino or parmesan cheese and bake in a pre-heated 350 degree oven until heated through and slightly browned.  Serve immediately as part of a meal or as an appetizer.

Basic Polenta:

Serves 2

1 cup organic polenta yellow corn meal ( found in health food stores)

3 cups water

1 tsp salt

1 Tbsp. ghee

Put corn meal in a saucepan and add the water and salt.  Stir and begin to heat on medium high while stirring.  Once mixture starts to boil lower heat to low and cover with the lid cracked.  Stir every few minutes so the corn meal does not stick or clump simmering for 15 minutes.  Remove from heat and add ghee.  Stir and serve immediately or follow one of the suggestions listed above.


Filed Under: Monica's Recipes, Uncategorized Tagged With: gluten-free starch, polenta

Just Say No–It’s Easier

June 2, 2023 by towers

Did it ever occur to you that you would be better off just saying no to gluten?  The people who need to go gluten-free the most are the ones who cannot imagine what they would eat if they stopped eating wheat flour products.  Some don’t even know what wheat flour products are though they eat them three times a day!   Bread, pasta, cakes, cereals, pastries, crackers, and flour products of all kinds made from wheat can conveniently fill the stomach leaving little room for a variety of delicious and interesting, health-promoting foods.

The main reason I promote a gluten-free diet for everyone (not just people with auto-immune conditions, GERD, constipation, IBS, arthritis, etc.) comes from my observations of the behavior of people–even ones who are more health conscious– who don’t think gluten bothers them.  They will eat white flour products regularly because we are surrounded by them.  Today’s wheat flour  is one of the most problematic foods in the Western diet for many reasons.  (If you are not familiar with the work of Dr. Weston Price, check out the book “Nutrition and Physical Degeneration” written back in the 1930’s. While broad in depth, it includes a discussion of the devitalization of wheat in the Western diet–it tells the beginning of the story which has continued to get worse with wheat hybridization and then the  contamination of our wheat supply with glyphosate.)  Bread made with organic, freshly ground wheat that is fermented (sourdough) is the gold standard.  If you can’t have that, then just say no!

Filed Under: Healthy Habits

Onions with Basil Oil

June 29, 2020 by towers

It’s the season of onions and basil, especially if you are a gardener.  While fresh basil is usually available year-round in grocery stores, it is never as good as the very fresh leaves from your garden.  Now that I have an abundance from my garden I make basil oil every few days so there’s always some in the fridge. If you don’t have basil plants, support your local farmers market where you should be able to find it.

The basil oil recipe was posted last year and you can find it here.  If you have that already made this onion topping recipe can be made very quickly.

And on the topic of onions–don’t neglect them!  They are relatively inexpensive and store well so it makes sense to always keep them on hand.  If you have them in the garden they are likely ready to start harvesting.  Because they are so flavorful, onions can jazz up lots of other vegetables.  The other night I made this onion recipe to use as a topping on gluten-free pizza.  I spread some of the basil oil on the fresh-from-the-oven baked crust and then topped with these onions plus some pitted olives.  If you eat dairy, it would be delicious to put grated cheese over the basil oil and then top with the onions–just put it under the broiler for a few minutes to melt the cheese if desired.  Other options for the onions besides pizza are steamed green beans, broccoli, or cauliflower.  Of course, they would be good with the basil oil on pasta and I’ve done this with organic brown rice fettuccine.


Serves 2

1 cup chopped yellow onion

2 tsp. basil oil


Place the chopped onions in a baking tray (about 8 x 10-inch size).  Add the basil oil and stir until onions are coated. Spread the coated onions in a thin layer over the surface of the pan.   Bake in a 350 degree oven for 15 minutes or so.  Serve immediately.

Filed Under: Monica's Recipes Tagged With: basil recipe, easy pesto recipe, onion recipe, pizza recipe

Next Page »

Subscribe to get our Blog posts in your email.

* indicates required
/* real people should not fill this in and expect good things - do not remove this or risk form bot signups */

Intuit Mailchimp

(We don't spam or sell your email.)

Recent Posts

  • Love No Pain
  • Improvement in ALL My Conditions
  • (no title)
  • Move Without Pain!
  • Castor Oil and Baking Soda Skin Treatment

Categories

Tags

arm and hand numbness avocado recipe avocado smoothie back pain breastfeeding latching problems butternut squash recipe chick pea recipe coconut oil collard greens recipe cultured vegetables daikon radish recipe difficult neck movement dill sauerkraut eggplant recipe foot pain GAPS friendly GAPS friendly recipe gentle chiropractic adjustments gluten-free gluten-free recipe headaches headaches and chiropractic herb tea high fructose corn syrup hip pain immune system support jaw pain knee pain knee pain and chiropractic low back pain low back pain and chiropractic mid-back pain migraines neck pain neck pain and chiropractic treatment pesto recipe raw fudge scoliosis separated shoulder and chiropractic shoulder injury shoulder pain shoulder pain and chiropractic sweet potato soup vegetable juice weight loss

Good Nutrition

Warming Broth for a Cold

When you're feeling down with a cold, the last thing you may want to do is cook!  Well, if you keep a few ingredients on hand you can make this nourishing, soothing broth in a few minutes.  If you … [Read More...]

  • Oatmeal is Back
  • Ginger Punch with a Kick
  • Polenta

Children’s Adjustments

Children's chiropractic adjustment at Towers Chiropractic

Children with back pain

Children suffer injuries that lead to misalignments just as adults do. Children generally respond very well and quickly to gentle chiropractic adjustments. A case in point is that of a 5 year-old … [Read More...]

  • Adjusting Children

Towers Family Chiropractic

2302 Colonial Ave, SW, Ste A
Roanoke, VA 24015
(540) 343-6636

Our hours are:
Monday, Wednesday, Friday:
10:00am – 1:00pm and 2:00pm – 6:00pm
Tuesday, Thursday:
7:30am – 11:30am and 12:30pm – 4:00pm
Saturday:
9:00am – 12:00pm

These statements have not been evaluated by the Food and Drug Administration. The information on this website is not intended to treat, diagnose, prevent, or cure any disease.

Copyright © 2025 · Towers Family Chiropractic by Soupbone Creative