Towers Family Chiropractor

Helping You to Better Health Naturally

  • Home
  • About Us
  • Our Chiropractic Services
    • Chiropractic Care
    • Acupuncture
    • Nutrition Services
  • Helpful Videos
    • Posture Screening for Scoliosis and Posture Imbalances
    • Spinal Exercises
  • Patient Forms
  • FAQ
  • Contact Us
  • Chiropractic Solutions
  • Children’s Adjustments
  • Monica’s Recipes
  • Nutrition News
  • Healthy Habits
  • Patient Testimonials

Grain-free Banana Bread

April 26, 2016 by towers

Looking for gluten-free or low glycemic “bread” recipes?  Here’s one that’s grain-free and very easy.  It is sweet enough to substitute as a cake–just put some chocolate icing on it (mix equal parts melted ghee or coconut oil, honey, and cocoa powder and add some vanilla).  The “flour” I use is shredded dried coconut that is blended until finely ground in a blender.  Arrowroot is available at the Co-op and at most health food stores.

2 cups dried, shredded coconut, blended into a powder in a blender

4 Tbsp. arrowroot flour or powder

1 rounded tsp. baking powder

1/2 tsp. sea salt

1 ripe banana–it needs to have brown spots so it is sweet!

2 tsp. vanilla extract

1 Tbsp. ghee or coconut oil

2 eggs

1 to 2  Tbsp. honey

In a food processor, mix the dry ingredients.  Add the rest of the ingredients and process until thoroughly mixed.  It should be the consistency of cake batter–thick but still drops off of a spoon.  You may need to add more arrowroot but do it by 1 tsp. increments–if you add too much arrowroot the bread will be rubbery so be careful!

Bake in a cake pan at 350 degrees F until a knife comes out clean and the bread is slightly golden on top–about 15 minutes.


Filed Under: Monica's Recipes Tagged With: gluten-free banana bread, grain-free banana bread

Coconut Milk as a Cream Substitute

March 14, 2016 by towers

For the dairy-free, finding a good cream substitute is not easy.  (I prefer coconut over nut or rice milk.)  When I say good, I mean one that contains relatively few ingredients that are wholesome.  Canned organic coconut milk meets that requirement over any product I have seen in a carton and when it is prepared this way I believe it is cheaper.  The best buy for canned coconut milk is the classic (not the light) that is then diluted and blended to keep it emulsified and “pourable”.  I use this in teas (chaga-chicory) and in smoothies, or in recipes calling for coconut milk.

1 can Native Forest Organic Classic coconut milk

water

1 tsp. vanilla extract, optional

stevia, optional

2 Tbsp. ghee, optional

If you have an immersion blender this is very easy (otherwise use a blender and transfer to a glass jar after blending).  Empty the contents of the can into a wide-mouth, quart-sized mason jar.  You may need to spoon it out if it is separated and too thick to pour. Then fill the can full of pure water and add to the mason jar.  Use your immersion blender to thoroughly blend this mixture right in the glass jar.  Add vanilla and a few drops of stevia extract if desired. I have also experimented and added melted ghee to this to add to the flavor (some dairy-free folks tolerate ghee just fine). Blend the contents of the jar again.  Keep refrigerated.

Filed Under: Monica's Recipes Tagged With: cream substitute, dairy-free coconut creamer

Cauliflower Soup with Smoked Salmon

March 14, 2016 by towers

Last night we had cauliflower soup (see previously posted recipe) but I wanted to add some protein to it. We had some smoked salmon on hand so I broiled it lightly and served it on top of the soup.  It was actually quite a nice combination!  Needless to say, this is a fast dinner when served with a salad, especially if the soup is leftover or pulled out of the freezer.

Serves 2

1 quart of cauliflower soup

2/3 of a  package of smoked wild salmon–this is about 8 thin slices (Be sure it is wild caught salmon and look for a brand that does not have preservatives)

Fill two bowls with about 2 cups of hot soup.  Spread the salmon slices on a baking tray and put under the broiler in an oven or toaster oven for 3-4 minutes–just enough to warm through and get a little crispy.   Top each bowl of soup with 4 slices of the salmon. Serve immediately.


Filed Under: Monica's Recipes Tagged With: smoked salmon garnish, smoked salmon with soup, smoked wild salmon recipe

Zoodle Salad

March 2, 2016 by towers

Here’s another zucchini “noodle” recipe using the vegetable spiralizer (I have a Paderno).  There’s room for creativity with this one.  To make this dish a meal in itself, consider adding any or all of these additional ingredients: garbanzo beans, feta cheese, sweet red pepper, red onion, artichoke hearts.  A quarter to a half-cup of each would be good (but only a Tbsp. of finely chopped onions).  This dish is also good served with deviled eggs.

Serves 3-4

2 small zucchini, spiralized

2 Tbsp. extra-virgin olive oil

1/3 cup kalamata olives, pitted

2 cloves garlic, crushed

1/4 cup dried tomatoes, soaked, drained and chopped

1/4 cup chopped cilantro

1 avocado, cubed

2 tsp. ghee

salt, black pepper to taste

Blend the pitted olives with the olive oil in a blender (an immersion blender works well–blend in a wide-mouthed pint-sized jar). Transfer this paste to the bowl you want to serve the salad in.  Add the tomatoes, cilantro and avocado to this bowl also and toss to mix well.  Now saute the garlic very briefly in the melted ghee in a skillet–just  to let it sizzle a little but not brown. Add the zucchini noodles immediately and stir well so that the noodles get coated with the garlic and ghee.   Don’t allow them to cook and get soggy–all you want is to get them warmed up and coated.  Stir for a minute over the heat and then add to the bowl.  Mix the salad well.  Add salt and pepper to taste.  Serve immediately.

Filed Under: Monica's Recipes Tagged With: kalamata olive paste, spiralized zucchini, zucchini noodles, zucchini salad

Quick Lentil Salad

January 27, 2016 by towers

You will need sprouted lentils to make this recipe so please review my previous post on lentil soup that discusses how to sprout lentils. The reason this recipe is quick and also easy on the digestive system is because of the use of sprouted lentils. (Don’t try to substitute!) You can’t buy sprouted lentils most places but it is very easy to sprout them yourself and they keep in the fridge for a week.  Once you have them you can make this dish, the soup, or lentil burgers over the course of the week.  Prepare the salad first and then make the lentils so that you can serve immediately.

Serves 2

Salad

4 cups mixed greens/lettuce–I used endive and arugala but any lettuce or lettuce mix is fine

1 avocado, peeled and cubed

2 Tbsp. extra-virgin olive oil

1 Tbsp. balsamic vinegar

feta cheese to garnish, optional

Lentils:

2 cups sprouted lentils

1/2 cup finely chopped carrots

6 cloves garlic, crushed

2 Tbsp. ghee (you could substitute coconut oil)

1/3 cup chicken broth

2 tsp. tamari

1/4 tsp. cayenne (optional)

salt and pepper to taste (add at the end)

Mix all the salad ingredients together except the feta cheese.  Place 1/2 the mixture in each of 2 large salad bowls.

Now prepare the lentils.  Melt the ghee or coconut oil in a skillet over medium heat.  Add the crushed garlic and stir for a minute or so but NOT long enough to brown..  Add the lentil sprouts and carrots and stir well.  Stir this mixture over medium heat until the lentils wilt and then add the broth, tamari and cayenne.  Lower the heat to medium-low and simmer for 10 minutes or until most of the liquid cooks off.  The mixture should be moist but not soupy.  Add salt and pepper  to taste.  Spoon half the mixture on top of each of the 2 salads.  Garnish with feta if desired.  Serve immediately.


Filed Under: Monica's Recipes Tagged With: low carb lentil recipe, sprouted lentil salad

Vegetable Shepherd’s Pie

January 13, 2016 by towers

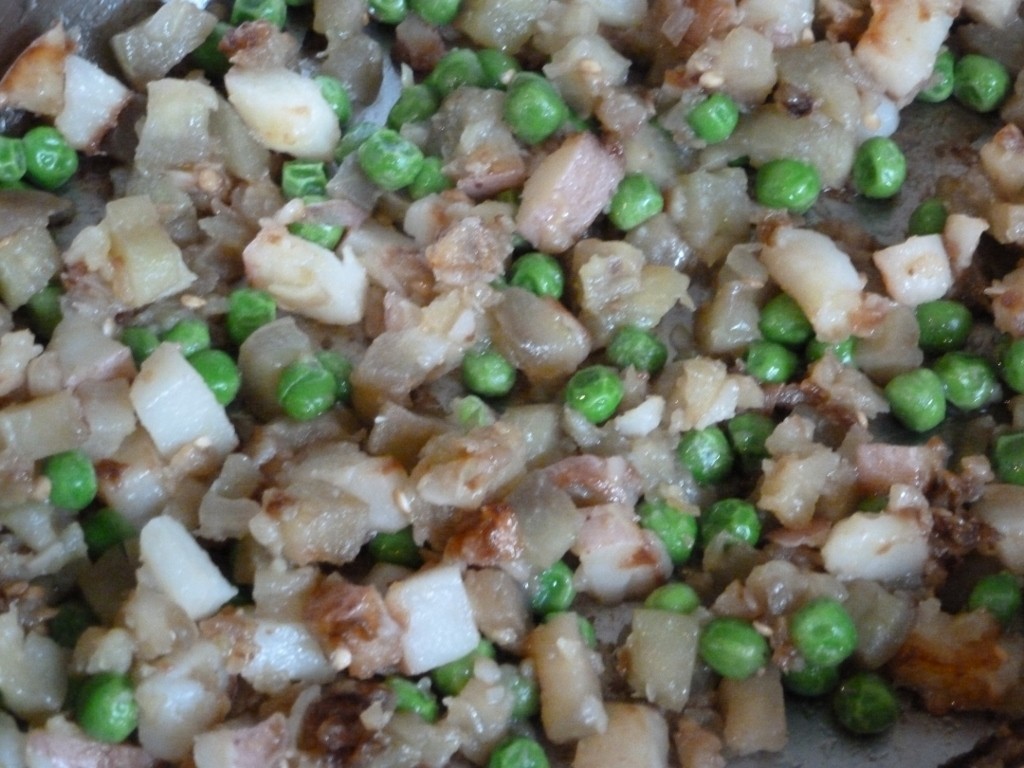
This vegetarian version of shepherd’s pie (inspired by a recipe in the cookbook, Moosewood) is a different and very satisfying way to have vegetables.  I tend to make it in the colder months of the year when I prefer to eat more cooked foods.  It does contain dairy but I use feta (goat cheese) and romano (sheep’s milk cheese);  you could substitute cheddar cheese and parmesan made with cow milk which is what the original recipe used.

Serves 2-4

Filling:

1 medium eggplant, peeled and cubed in 1/2 inch pieces

1 large onion, chopped fine

1 1/2 cups chopped mushrooms

1 cup frozen green peas

3 Tbsp. extra-virgin olive oil

1/2 cup crumbled goat feta cheese

1/2 tsp. each of dried oregano and thyme

1 Tbsp. organic tamari

salt and pepper to taste

Crust:

2 large red potatoes, peeled and quartered

2 Tbsp. butter or olive oil

1/2 cup grated Romano or Parmesan cheese

salt and pepper to taste

Place potatoes in a sauce pan half covered with water.  Bring to a boil and reduce heat to medium low and cover.  Cook until potatoes are tender when pierced with a fork.  While the potatoes cook, prepare the filling.  Saute the onions in the olive oil in a large skillet over medium heat for 4-5 minutes stirring occasionally.  Add eggplant and stir well and cover.  Stir every few minutes and cook until eggplant is tender for about 15 minutes.  Don’t allow to burn on the bottom–add 1 tbsp. of water if you need to to keep the eggplant cooking without burning and lower heat also if it starts to stick. Stir in mushrooms, peas, spices and tamari.  Cover and cook for another few minutes.  The peas and mushrooms don’t need to be cooked through at this point because they will be cooked further in the oven.  Stir in feta cheese.  Taste adding salt and pepper as desired.

Drain the cooked potatoes–leave about 2 Tbsp. of the cooking water with the potatoes so they are moist.  Mash them with a potato masher.  Add butter or olive oil and salt and pepper to taste.

Now spread the filling in a baking dish (8 inch square or equivalent).  Spread the mashed potatoes on top evenly so filling is covered.  Sprinkle romano cheese on top.  Bake in a preheated 375 degree F oven for 15 minutes or until top is lightly browned.  Serve immediately.


Filed Under: Monica's Recipes Tagged With: shepherd's pie recipe, vegetable shepherd's pie recipe

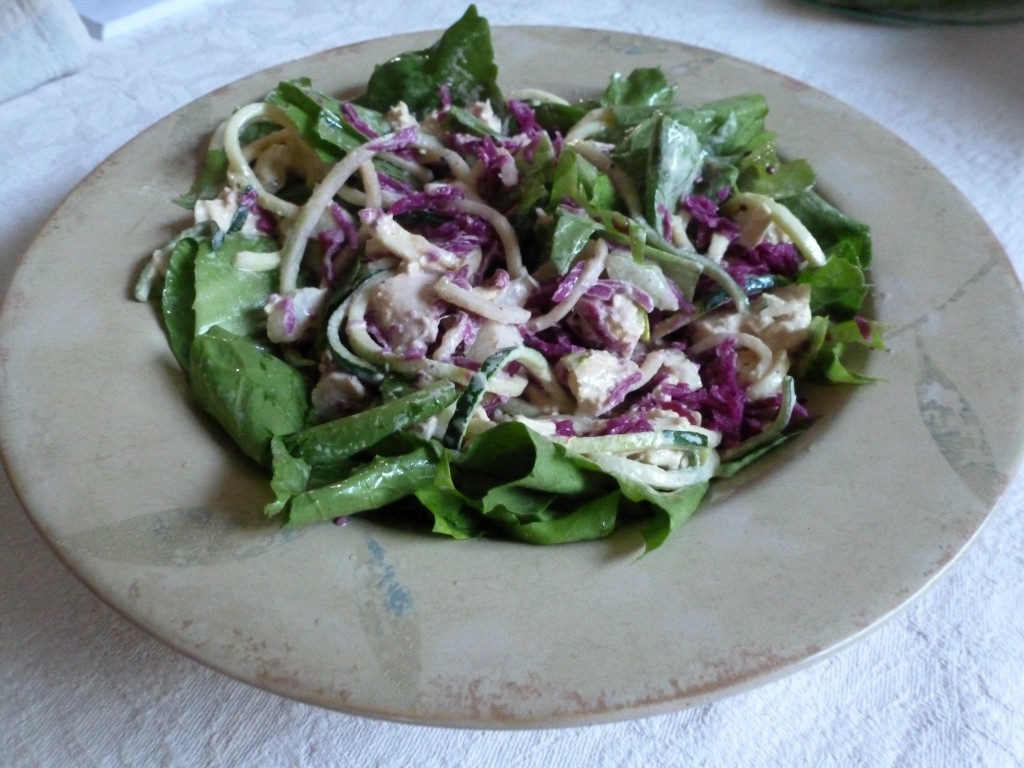
Waldorf Salad w/ Cultured Cabbage

November 9, 2015 by towers

Waldorf salad is one of my favorites.   Here’s my new and improved version.  I replaced plain raw red cabbage with cultured red cabbage which provides lots of probiotics and increases digestibility of the cabbage.  Also, I made my own mayo with good oils.  It might seem like a lot of work but remember that 1 head of cabbage will make about 1 quart of cultured cabbage which will be enough to make the salad 4 times.  The cultured cabbage will keep in the fridge for 1 month or so.  Also, you can substitute yogurt for the mayo–I’ve done this and loved it so if you are dairy-tolerant give it a try.  Once you have gathered the ingredients the salad is quick to make.  Look forward to your feedback!

Cultured Red Cabbage

1 head of organic red cabbage, finely shredded (I used a food processor)

1 rounded Tbsp. of sea salt

1 Tbsp. lemon juice

1 Tbsp. of equal parts of ground anise, fennel and caraway seeds (optional) (use a blender to grind the seed)

1/2 packet of Body Ecology Cultured Vegetable starter, optional

Mix all ingredients in a glass or stainless steel bowl.  Let sit for 15 minutes to allow the salt to pull the liquid out of the cabbage.  Pack the cabbage into a wide-mouthed 1/2-gallon sized canning jar (or 2 wide-mouthed quart sized canning jars).  Follow the directions for making cultured veggies here.  Allow to culture at room temperature (65-70 degrees F) for about 5 days pressing down every day.  When it stops bubbling when you press down, it is ready to be refrigerated.  It will keep about 4 weeks but try to keep the cabbage submerged in the liquid for better storage–just press them down after you have spooned out what you want and try  not to spoon out much of the liquid.

Good Mayonnaise

2 egg yolks from pasture-raised chickens fed antibiotic/hormone-free feed, room temperature

1 tsp.. honey–optional

2 Tbsp.. raw, organic apple cider vinegar

1/4 to 1/2  tsp. sea salt

1 tsp. prepared yellow mustard

1 cup (room temperature–not cold) extra-virgin olive oil (1/2 c olive oil and 1/2 cup cold-pressed avocado oil is an option)

Be sure your ingredients are at room temperature.  Place  first five ingredients in food processor and pulse until well blended–be sure this is thoroughly mixed by scraping the bottom and sides of the processor with a spatula.  Then, while the processor is running slowly pour in a thin stream the olive oil–think drizzle.  The mixture should stiffen  as you add the oil and be set once your oil is all added.  This is finicky and it has failed for me on occasion.  I prefer the version described below as I have had more success with it.  One step that is very important is the room temperature ingredients so don’t skip that!   It should be as thick as regular mayo but it will thicken more once refrigerated.   Keep refrigerated.

Postscript on the mayo:  Since posting this recipe I have seen recipes online for making mayo right in a mason jar in one step using an immersion blender–this is a great idea!  Place the egg yolks in a clean, dry wide-mouthed mason jar (16 or 32 ounce size).  Add the  apple cider vinegar, salt, mustard, and honey.  Pour the oil on top. Place the blender head all the way into the bottom of the jar where the egg yolks are and pulse briefly in bursts while holding the head in place (the bottom of the jar).  Do not move the blender head up and down until you see the “creamy white” mayo forming around the blender head and then only move it up slowly.  Once the egg yolks and other ingredients are clearly well mixed and the oil is starting to get pulled and changing to creamy yellow in color  continue to pulse while moving the head of the blender very slowly up and down gradually working your way up as the oil gets pulled in.  Do this until all the oil is emulsified.  Do not over-mix–as soon as the mayo forms, stop!  The mayo should be thick by this time.  Very nice to have a lot less clean-up–store the mayo in the fridge in the mason jar!

Serves 4

Waldorf Salad

2 Fuji or Gala organic apples, cored and chopped in bite-sized pieces

1/4 to 1/2 cup mayo or 1/2 cup organic whole milk yogurt

1 cup cultured red cabbage

1/2 cup celery, finely chopped

3 Tbsp. organic raisins

1/3 cup walnuts, chopped, or 1/3 cup toasted sunflower seeds

1/2 tsp. sea salt

Combine all ingredients and stir well.  Serve immediately.  Keep refrigerated but best used within a day.

Filed Under: Monica's Recipes Tagged With: cultured red cabbage, fermented red cabbage, healthy mayonnaise recipe, healthy Waldorf salad, homemade mayo using an immersion blender, Waldorf Salad made with cultured cabbage

Green Smoothie

October 26, 2015 by towers

There are many green smoothie recipes available in books and online.  The idea of using fresh green stuff in a quick breakfast smoothie is appealing but spinach is very high is oxalates and kale in its raw form is a problem for the thyroid.  Most of the recipes I’ve seen use either one or the other; the cruciferous vegetables (kale, etc.) are best cooked or fermented while high oxalate foods (spinach, beets and beet greens, swiss chard) are best limited in the diet and should not be eaten on a daily basis. These recipes also often use nut butter or nut milks so I thought I’d offer something different.  Leave out the egg yolks if you wish but know that they are a superfood when the eggs come from truly healthy chickens. Let me know what you think!

Serves 1

1/2 avocado

1/2 banana

1 cup packed endive, escarole or mixed leaf lettuce

2 Tbsp. collagen powder (Great Lakes)

2 egg yolks (use fresh eggs from pasture-raised chickens only, and save the whites for baking–use 2 egg whites in place of 1 egg)

1/4 cup water

stevia and vanilla to taste, optional

Place all ingredients except egg yolks in blender.  Blend very well.  Add egg yolks and blend briefly until just homogenous.

Filed Under: Monica's Recipes Tagged With: green smoothie, green smoothie with avocado, green smoothie with lettuce

GF Corn Bread

October 23, 2015 by towers

Masa harina is an practical substitute for corn meal in this gluten-free recipe. My perception is that when you omit wheat flour  the fine texture of the masa harina makes for a decent corn bread.  The flax and seeds give the bread a corn bread-like texture–if you want it sweeter substitute 1/2 cup of ground dry shredded coconut (use a blender  to grind it) for the sunflower and pumpkin seeds.  Just remember that if you do not buy organic masa harina it will very likely be made from GMO corn.  Also, if you replace the ghee with coconut oil, the recipe will be dairy-free as well as gluten-free.

1 cup organic masa harina or corn meal

1/8 cup each of ground flax and chia seed (whole flax seed and chia seed can be ground in a blender)

1/4 cup ground sunflower seeds

1/4 cup ground pumpkin seeds

1 tsp. baking powder

1/2 tsp. sea salt

1 apple, skinned and cored

2 eggs

1 Tbsp. honey

1/3 cup coconut milk

1 Tbsp. ghee or butter or coconut oil, melted

1 tsp. vanilla extract

Place dry ingredients in food processor and mix well.  Add ghee or butter or coconut oil and pulse until well mixed.  Add all other ingredients and process until well blended into a batter the consistency of cake batter (thick enough that it doesn’t pour off a spoon–it drops).  If it is too thick add 1 Tbsp. more of coconut milk at a time until the batter drops off the spoon readily.  Spoon into a small square baking dish–about 8 inches.  Bake at 350 degrees F until lightly browned and a knife placed in the center comes out clean–about 15-20 minutes.  Do not overbake or the bread will be dry.  Serve warm right away.  It’s good toasted the next day also.


Filed Under: Monica's Recipes Tagged With: gluten-free cornbread

Vegetable Medley

October 14, 2015 by towers

The biggest mistake people make with what they load on their plates is this:  NOT ENOUGH VEGETABLES!  The starches and often the protein foods crowd them out every time. There are lots of reasons for this so it is not always easy to remedy. However, it does all start with an awareness.  So imagine the perfect plate that you could have in front of you just one time a day.  Half of it is covered with a variety of colorful non-starchy vegetables.  The starch takes a back seat–just one quarter of the plate; and guess what?  The starch is not bread or a gluten-containing grain!  It is sweet potato or quinoa or brown rice or millet grits or butternut squash or peas or corn.  The other quarter of the plate is the protein food–eggs, fish, chicken, turkey, grass-fed beef, etc.

Here’s an easy way to prepare these vegetables.  You will need a vegetable steamer and a variety of mostly non-starchy, fresh vegetables–start with ones you like and with time you can get adventurous and try some new ones.  This recipe uses vegetables that I had on hand so use whatever you have keeping in mind that softer vegetables such as zucchini and red pepper take less time to steam tender than tougher ones like broccoli, cauliflower, green beans, and carrots.  Also, chop them finer to reduce cooking time.  You can always steam the tougher ones first and after 5 minutes add the rest and steam 3-5 minutes longer.  The goal is to have all the vegetables TENDER (there is just a little resistance when pierced with a fork), not overcooked and limp!

Serves 2

1 stalk of broccoli, or 2 cups 1-inch florets

1 small onion, chopped

1 carrot, halved lengthwise and  chopped 1/8 inch thick

1/2 cup chopped  sweet red pepper

1 cup sweet corn, fresh or frozen

1/2 cup chopped mushrooms, shitake is good

1 Tbsp. ghee or coconut oil or sesame oil

sea salt and ground black pepper to taste

Place all vegetables except the onion and mushrooms in the steamer.  Cover and bring the water in the bottom of the steamer to boil and reduce heat to low to keep the vegetables steaming gently.  While the vegetables are steaming (don’t forget about them!  Check for tenderness every few minutes by piercing with a fork and as soon as they are perfect take them off the steam and set aside until they can be added to the skillet), add to  a skillet the oil or ghee and the onion.  Saute a few minutes over medium-low heat and then add the mushrooms and saute for another 3- 5 minutes. Turn off the heat.  As soon as other vegetables are tender add them to the skillet and stir well.  Salt and pepper to taste and serve immediately.


Filed Under: Monica's Recipes Tagged With: fresh vegetable recipe, how to steam vegetables, steamed vegetables, the perfect plate

« Previous Page
Next Page »

Subscribe to get our Blog posts in your email.

* indicates required
/* real people should not fill this in and expect good things - do not remove this or risk form bot signups */

Intuit Mailchimp

(We don't spam or sell your email.)

Recent Posts

  • Safer, Healthier Breast Screening in Roanoke
  • Listen to Your Wife
  • First Time In My Life
  • Four-Season Gardening
  • Cry For Help

Categories

Tags

arm and hand numbness avocado recipe avocado smoothie back pain breastfeeding latching problems butternut squash recipe coconut oil collard greens recipe cultured vegetables daikon radish recipe difficult neck movement dill sauerkraut eggplant recipe foot pain GAPS friendly GAPS friendly recipe gentle chiropractic adjustments gluten-free gluten-free recipe headaches headaches and chiropractic healthy chicken salad herb tea high fructose corn syrup hip pain immune system support jaw pain knee pain knee pain and chiropractic low back pain low back pain and chiropractic migraines neck pain neck pain and chiropractic treatment pesto recipe raw fudge sciatica scoliosis separated shoulder and chiropractic shoulder injury shoulder pain shoulder pain and chiropractic sweet potato soup vegetable juice weight loss

Good Nutrition

Warming Broth for a Cold

When you're feeling down with a cold, the last thing you may want to do is cook!  Well, if you keep a few ingredients on hand you can make this nourishing, soothing broth in a few minutes.  If you … [Read More...]

  • Oatmeal is Back
  • Ginger Punch with a Kick
  • Polenta

Children’s Adjustments

Children's chiropractic adjustment at Towers Chiropractic

Children with back pain

Children suffer injuries that lead to misalignments just as adults do. Children generally respond very well and quickly to gentle chiropractic adjustments. A case in point is that of a 5 year-old … [Read More...]

  • Adjusting Children

Towers Family Chiropractic

2302 Colonial Ave, SW, Ste A
Roanoke, VA 24015
(540) 343-6636

Our hours are:
Monday, Wednesday, Friday:
10:00am – 1:00pm and 2:00pm – 6:00pm
Tuesday, Thursday:
7:30am – 11:30am and 12:30pm – 4:00pm
Saturday:
9:00am – 12:00pm

These statements have not been evaluated by the Food and Drug Administration. The information on this website is not intended to treat, diagnose, prevent, or cure any disease.

Copyright © 2025 · Towers Family Chiropractic by Soupbone Creative