Here is an update on the gluten-free bread described below: I have had people with nut allergies wanting to make this bread which has almond flour originally. It works very well to substitute brown rice flour (this is available sprouted also) or tigernut flour for the almond flour. Tigernut is a tuber, not a nut and it can be found online when looking for gluten-free flours–a good brand is Organic Gemini. Also, if you have egg whites you want to use, blend some with the water used in this recipe and reduce the volume of water accordingly. It will increase the protein content of the bread (tigernuts are lower in protein than almonds) and allows it to brown nicely. Also, I now add 1/2 cup ground flax seed. You may need to add a little more water (1-4 Tbsp.) to the dough if you add ground flax seed in order to achieve the soft but not-sticky texture shown in the video.
One other note to keep in mind: you may have to add more water than is listed in the ingredients. I add enough water to get a soft dough–it is not sticky as I knead it either as the flours used are highly absorbent–especially the added ground flax. I probably use about 1/4 to 1/2 cup additional water. This soft dough is easier to work with and makes a nicer bread.
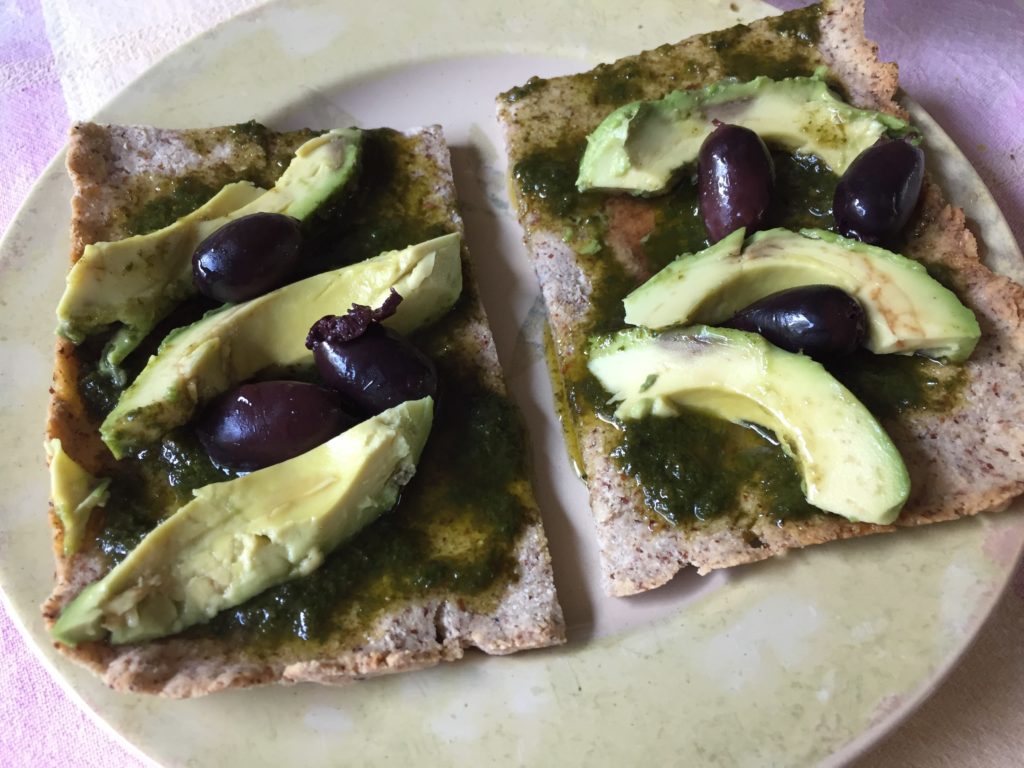
Watch Dr. Eric Berg’s video below for a great recipe for gluten-free bread. I like it because of the taste/texture but also because it is a lot lower in carbs and higher in fiber than most GF breads–plus it doesn’t have any objectionable starches in it like potato starch. I have used it for rolls or as pizza dough. My latest version of pizza had a crust made with this dough which I pressed out into an oiled pizza pan (you can sprinkle sesame seeds in the bottom of the pan first–I usually do) and baked at 350 degrees F until crusty–with no toppings. After it cooled but was still warm, I spread a couple tablespoons of the basil oil on it, followed by avocado slices or sliced tomatoes, and olives. Grated peccorino cheese is a great topping too. Ready to serve and super easy.
If you use almond flour, it’s best to use the light-colored almond flour which is made from blanched almonds.
Also, you can refrigerate the dough for a few days; I do this so I can make a fresh pizza or flat bread very quickly during the week. Great with olive oil which has been flavored with a clove of fresh garlic and some salt.
Here is the list of ingredients:
1 cup each of coconut flour, blanched almond flour (or sprouted brown rice flour or tigernut flour), and arrowroot flour
2 Tbsp. psyllium
2 Tbsp. ground chia seeds (I use the blender to grind them and I also add 2 Tbsp. flax seed ground in blender)
1 tsp. sea salt
2 tsp. dry baking yeast granules
1 and 1/4 cup water (egg whites can substitute for some of this liquid if you have fresh egg whites to use)
2 tsp. honey or maple syrup
Follow the directions given in the video for how to mix the ingredients.